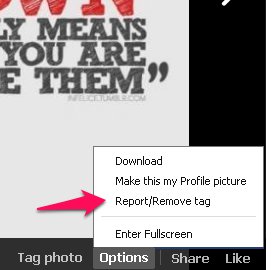
We have so many things on the internet that we wanna store as an image but not a page and some of us might not the way to do it. So, in this post, I will be discussing about various sites, plug-ins for Mozilla and extensions for Chrome that help you take a screen shot. These are very helpful and are easy to handle.
Fire Shot - Plug-in for Mozilla
This is a very handy plug-in or add-on available in Mozilla and I assure you this will never let you down, not in any case. You can do almost a complete editing of a picture like annotating, adding watermark, highlight particular text or area, crop, edit, draw, blur and a lot more.
How to get this
- Visit the Fire Shot page on Mozilla
- Click on 'Add to Firefox'.
- Then, click on the install
- If it doesn't work as soon as you install it, go to add-ons tab (ctrl+shift+A).
- There under extensions, click 'Enable' beside Fire Shot.
- It asks to restart to Firefox, do as it says.
Now you're done with the installation of Fire Shot.
Working
- Right Click on the page that you wish to capture, then click on Fire Shot.
- It provides you options like Capture Entire Page, Capture Visible Area and Capture Selected Area.
Difference between Capture Entire Page and Capture Visible Area : The difference between these two is quite simple. If you choose Capture Entire Page, it capture the page from top to bottom, and If you choose Capture Visible Area, it captures only the area of page that is visible on your monitor i.e., the area of the page that you're in.
- And, when you click on any of above three options, you are given options like edit, save, save as pdf etc.
- Select the option that you want. After that, you are allowed to select an area of the page if you choose Capture Selected Region or captures automatically if you choose any of the other two options.
Editing and Storage
If you choose 'Edit' option, you can get a wide range of features to edit your pic. Now, we go in detail about the options and their functions.
- You are provided with basic options like export, upload, copy, mail and print. Now, when I say 'Upload', you might get a doubt, "Where does the image gets uploaded?" There's a site called easycaptures.com. You can create an account an upload screen captures and you pictures to the site or you can upload anonymously.
- You are given a hell lot of options through which you can crop, add a shape, draw anything you wish to, highlight an area, add a pointer, add a text, add another image etc.
- The features that I like the most in this add-on is Invert and Glow. With these features, you can highlight everything from an image to a text.
Now, here's the drawbacks of this add-on. The sound effect when you capture is a bit irritating. You cannot use Mozilla when the Fire Shot editor is running.
Here's the
demo given by the Fireshot.
Awesome Screenshot : Capture and Annotate
This is an extension in Google Chrome that helps you capture. This extension provides most of the options, but not all, provided by Fireshot.
How to get this
- Go to Awesome Screenshot page on Google Chrome.
- Click on 'Add to Chrome' and then 'Click Install'
- After installing the extension, you get a logo (camera lens) to the right top on the screen.
Working
- Click on the logo and you are given three options Capture Entire Page, Capture Visible Area and Capture Selected Area. Choose as you wish according to your need.
- After capturing you are given options that allow you to edit picture. Options are almost similar to that of Fireshot.
Editing and Storage
Editing with this extension is easier and, like I said, its almost similar to that of Fireshot. You can crop, annotate, draw lines etc. With this extension you can highlight an area in the picture but not like the way you can in Fireshot. The highlight feature in Fireshot is kind of more effective.
You can store your screen captures temporarily in awesomescreenshot.com and that gives you a link through which you can share your screenshot. Or you can save it on diggo.com or Google Drive.
Online Screen Capture Tool - Web Screenshots
This in an online screen capture that helps you capture. It's quite simple to use. You give it an URL and it takes a snap of the page and gives a link to download the screenshot.
How to Get it
- You need not install any extension or add-on. You just go to the website and provide the URL of the page that you want to take a snap of.
Editing and Storage
- You neither have options to edit the picture nor to store it online.
There are too many drawbacks for this online tool. First thing is you can't capture a particular area on the page. You can't use this for sties like Facebook. For instance, if you wanna take a picture of your homepage in facebook (the URL of your homepage after logging in is www.facebook.com) and you provide the URL, it provides the screenshot of the Login Page in Facebook. The same case is with the G-mail, if you want to take a snap of an email and you provide the URL, it gives you the snap of Gmail login page. And the drawbacks go on.
So, I'm done now. I've given you an add-on for Mozilla, Extension For Chrome, An online tool for Screen Capture. Had any problems with these? Feel free to ask.


